When and how do you use a graduated neutral density filter? In this short video, I explain how this filter can help you take better landscape photos by reducing the dynamic range in your image.

Spread the joy! Share today’s tweetable!
Video Transcript
Do you ever have trouble photographing a landscape because the sky is so much brighter than your foreground? Hi, I’m Julie from Ultimate Photo Tips, and for today’s tip, I want to talk about a filter that I use on a regular basis: the graduated neutral density filter, or graduated ND filter. It’s also called a split ND filter.
This filter is used when one section of your image is a lot brighter than the another section. A typical example is a landscape where the sky is a lot brighter than the foreground. In a situation like this, what happens is that your camera’s sensor can’t always capture both the brightest and the darkest tones in the scene – the dynamic range is just too great. That means you end up either blowing out the highlights or blocking up the shadows.
That’s where a graduated ND can help. This is what it looks like; it’s clear at the bottom, and dark at the top. What you need to do is line up the transition with your horizon. So where it’s clear, it’s like there’s nothing there, and where it’s dark, it will hold back the sky.
You want to buy this kind, which is made by Cokin, or Lee, that fits into a holder on the front of your lens. It just slides in, and that way, you can line up the transition with your horizon. This is much more useful than the filter which screws onto the front of your lens because that transition is in a fixed position.
You can buy these filters in a kit, which comes with a 1-, 2-, and 3- stop filter with both hard and soft transitions. But, if you just want to buy one, I recommend this one, which is a 2-stop soft transition, and is the one I find the most useful.
Let’s look at a couple of examples.
© Julie Waterhouse Photography
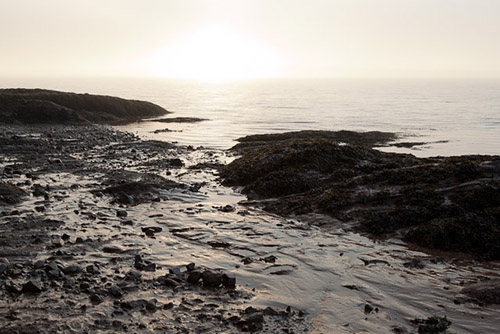
without graduated neutral density filter
In this image, I’ve exposed for the foreground, and the bright sky has completely blown out.
© Julie Waterhouse Photography
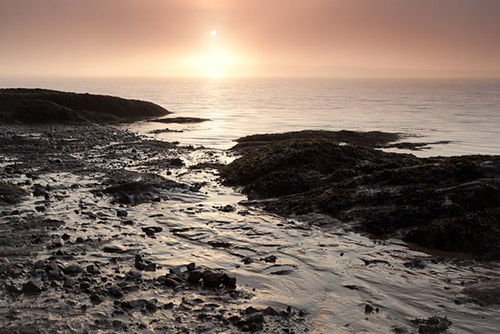
with graduated neutral density filter
By adding a graduated ND filter, I’m able to get both the foreground and sky exposed properly.
© Julie Waterhouse Photography
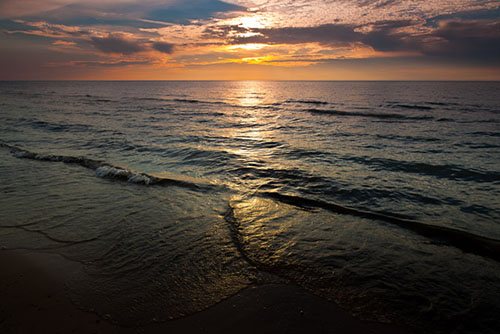
without graduated neutral density filter
In this image, I’ve exposed for the sky, and my foreground is way too dark. I want to open up those shadow areas.
© Julie Waterhouse Photography
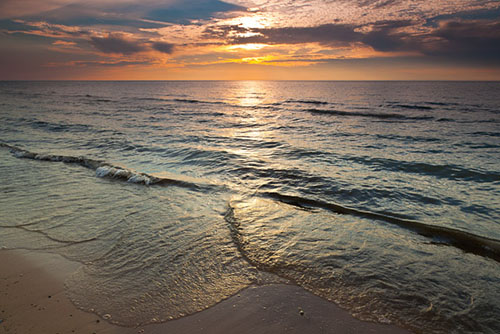
with graduated neutral density filter
Again, I add a graduated ND filter while I’m shooting, and now I can brighten up those shadows, while holding back the sky.
You may have guessed already that there’s one big scenario when you can’t use this filter, and that is if the transition from light to dark is not a straight line, such as when there’s a tree in the foreground. If you use the filter in that scenario, then the tree will appear darker than it should. In that case, you’d have to resort to creating an HDR image instead.
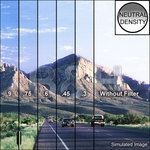
Check out
graduated neutral density filters
at B&H
All in all, though, this is a really useful filter, and I recommend that you have one in your kit. I use mine all the time.
That’s it for today! For more helpful tips, drop by ultimate-photo-tips.com for a visit, and make sure to sign up for my newsletter while you’re there.
Happy shooting and I’ll see you next time!