Having trouble photographing in the bright sunlight? Let me show you how a diffuser can help you reduce contrast when the light is very bright.

Spread the joy! Share today’s tweetable!
Video Transcript
It’s warm and bright and sunny again, and that makes us want to grab our cameras and start shooting! But what about that harsh light? How can we work with it so that our photos look good?
Hi, I’m Julie from Ultimate Photo Tips, and today I want to show you how to use a diffuser to help you reduce contrast when the light is very bright.
Although it feels great to be out on a sunny day, it’s one of the toughest shooting situations for our cameras to handle. That’s because the dynamic range — the range of light from darkest to brightest – is often too great to be fully captured by your camera’s sensor. The highlights blow out and the shadows block up when there’s too much contrast.
What can you do? If you are photographing a relatively small area, such as a portrait or flower, then a diffuser can be the answer. A diffuser is anything that’s white and translucent. It lets some of the light through, but not all of it, and the light that does pass through gets scattered, or diffused. As a result, you get less contrast.
Let’s take a look at some examples.
I went out this morning at about 10 o’clock to photograph some tulips in my backyard. The light was very bright. This is a shot straight out of the camera. You can see that there’s a lot of contrast. The shadows are dark and the highlights are bright, and both of those distract you from the subject itself.
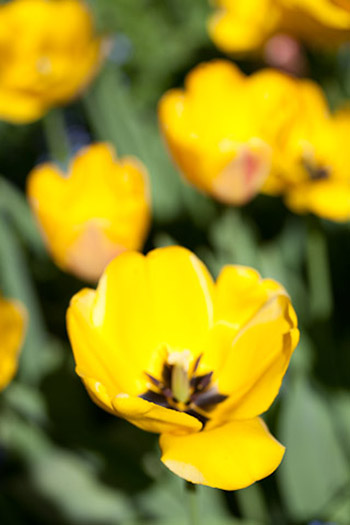
Bright sunlight creates high contrast
© Julie Waterhouse
Now, here’s the same shot taken with a photography diffuser added. The contrast has been dramatically reduced, and now you can see detail in the flowers.
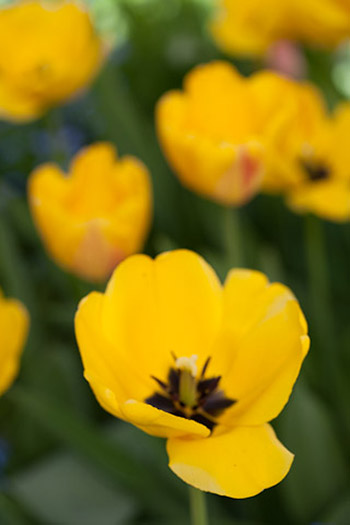
Using a diffuser reduces contrast
© Julie Waterhouse
Here’s an overview shot of the scene so you can see how I positioned the photography diffuser between the light and my subject. You can actually see it casting a shadow over the tulips.
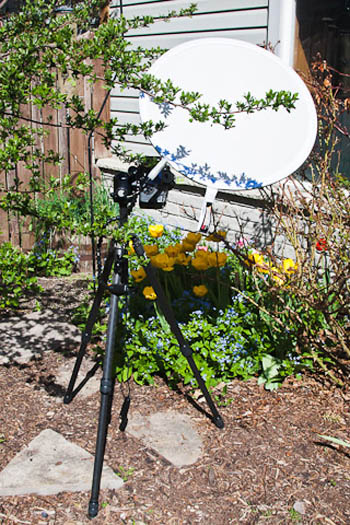
Setting up the photography diffuser
© Julie Waterhouse
Here’s a second example. I was photographing the leaves on my crabapple tree against the backdrop of my brown fence. Without the diffuser, there’s a lot of contrast in the leaves, and those brights and dark spots are distracting.
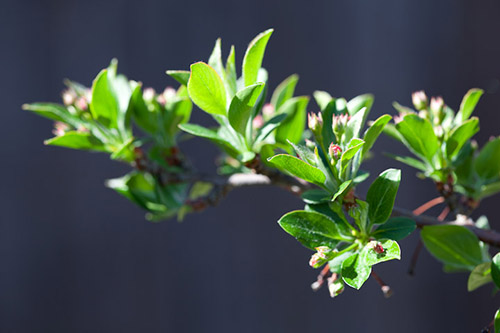
Bright sunlight creates high contrast
© Julie Waterhouse
With a diffuser, again, the contrast is significantly reduced.
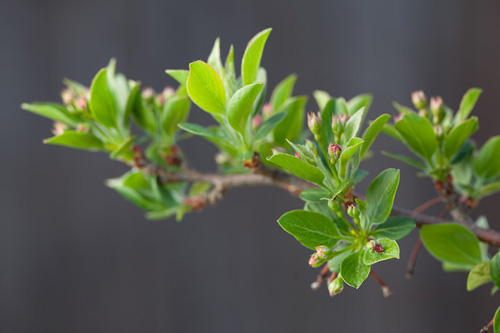
Using a photography diffuser reduces contrast
© Julie Waterhouse
Now, I liked the dark background of the first image, so I can add that back in with some post-processing, while keeping low contrast on the leaves.
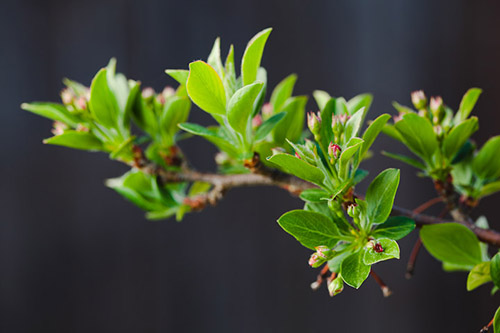
I’ve darkened the background in post processing
© Julie Waterhouse
Again, here are a couple of overview shots so you can see how my diffuser was positioned.
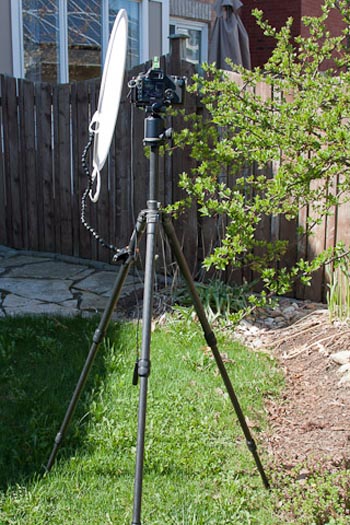
Setting up the diffuser
© Julie Waterhouse
I have it quite close to my subject, which I’ve circled in red.
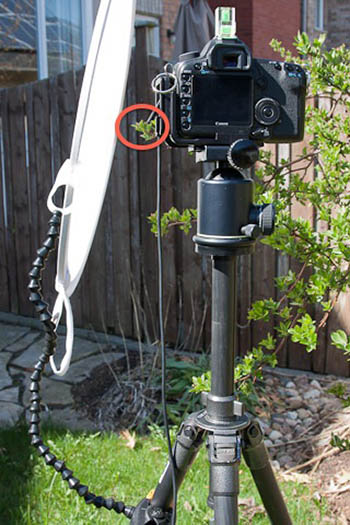
Setting up the diffuser (subject circled in red)
© Julie Waterhouse
You can make you own diffuser using a frame made out of foamcore, and covering it with some translucent white paper. You can also buy collapsible diffusers in a variety of sizes.
Bonus tip: You need to make sure you use a large enough photography diffuser that is also covers any background that’s in your photo as well, otherwise you’ll have a bright and contrasty background that distracts from your nicely diffused subject.
So, enjoy the bright sunshine, but don’t forget to pack a diffuser in your kit.
For more great photo tips, come on over to ultimate-photo-tips.com, and make sure to sign up for my newsletter while you’re there. That’s where I share ideas and inspiration that I don’t share anywhere else.
Happy shooting, and I’ll see you next time!